By Mira Whiting

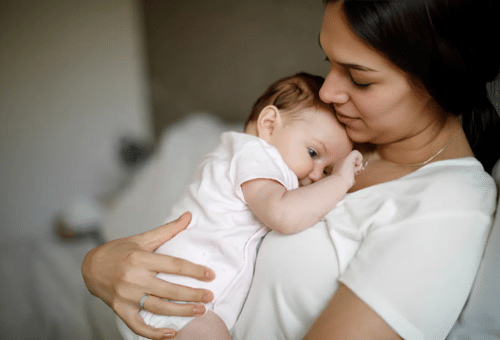
Hey there! I’m Mira, mom of three and former Mothers’ Milk Bank Northeast milk donor. I’m also a professional photographer and I’m here today to offer tips for taking those totally adorable photos you send in to the milk bank. You know the ones I mean—your milk and your baby, showing how sweet your little one is to share their milk!
Can I let you in on a little secret?
While of course I follow Mothers’ Milk Bank Northeast for their interesting, substantive posts on social media about the state of milk banking, my favorite posts are those of the babies and their milk, all packaged up and ready to go help other babies.

When I was donating milk and took pictures just like these, I always thought maybe one day my kids might see them in the photo album and ask about it. Then I’d get to share what an amazing thing they were part of before they even really understood what it means to help other people. Every time I see one of those photos float by on my Facebook or Instagram, I hope all those babies grow up to feel good about how they shared their milk, too.
Here are five easy ways to help you take the best milk donation photo you possibly can:
About Mira Whiting
Mira Whiting is an award-winning portrait photographer who loves making her clients feel calm, comfortable, and confident during their photoshoots. Mira offers Newborn, Branding, Family, and Event Photography. Also a mom, Mira understands how busy life is and how kids don’t always cooperate. Trust that she has tricks up her sleeve to help bring out the best in your family! Learn more on her website or you can take her “Better Photos with Your Phone” online class here.

- Keep baby comfy: What does your baby like to do best? Sit up on their own? Sit in a chair? Tummy time? Lying on their back? Let your baby’s preferences lead the way.
- Keep it simple: We’ve all seen those super elaborate milk donation photos where the milk bags are laid out in a design around baby. They are SO cute. But I know when I was donating, the #1 concern in my mind was the cleanliness of everything surrounding the milk I was sending to such fragile babies. The cleanest way to showcase your milk is in the box it’ll be shipped in (you can always decorate the box! I’ve seen so many cool creative designs!) If you really want to get fancy without the box, go all the way and put your baby and the milk on a clean blanket. Do you have a quilt that Grandma made, or a blanket knit by your childhood best friend? Those are fantastic choices to keep everyone safe and add another layer of meaning to the shot you’re taking!
- Keep trying: If you don’t get the image you had in your mind’s eye the first time, keep trying and make sure to take as many photos as possible so you have more to choose from! You can try again another day, when your baby is in a better mood, or when the light is better. Try some different angles to see what you like best and don’t be afraid to play around!
- Plan your shot around your baby: When during the day is your baby happiest? Plan for then so you have the best chance of capturing a smile. If your baby is eating solids, it may work best to plan your little mini-shoot right before a meal rather than right after—clothes and baby’s face will be a little cleaner!
- Think about light: If you’re taking your photo indoors, the best light is generally between 10am and 2pm, but some houses have best light at slightly different times. Try to avoid super bright harsh light, but being near a window or having your baby face a window is a great way to make sure everything is lit in the most flattering way. Don’t “backlight” your baby—that’s photographer-speak for having a really bright light, such as a window, behind them. It’s very tricky to backlight well, and it can lead to a haze that makes it harder to see the details of your baby’s adorableness.

